Installing Cane Webbing In Cabinet Doors
HH Perkins Cane Webbing For Cabinets
Cane webbing is made from pre-woven Natural Strand Cane (rattan peel). Cane webbing is called many names, including rattan webbing, pressed cane, machine cane, pressed In cane, cane sheets, pre-woven, and rattan webbing. We use them interchangeably but mainly call it cane webbing or rattan webbing. This article will refer to it as cane webbing and rattan webbing. Cane webbing can be used on chairs, cabinets, bureaus, etc. This article will focus on the best practices for installing cane webbing into cabinet doors.
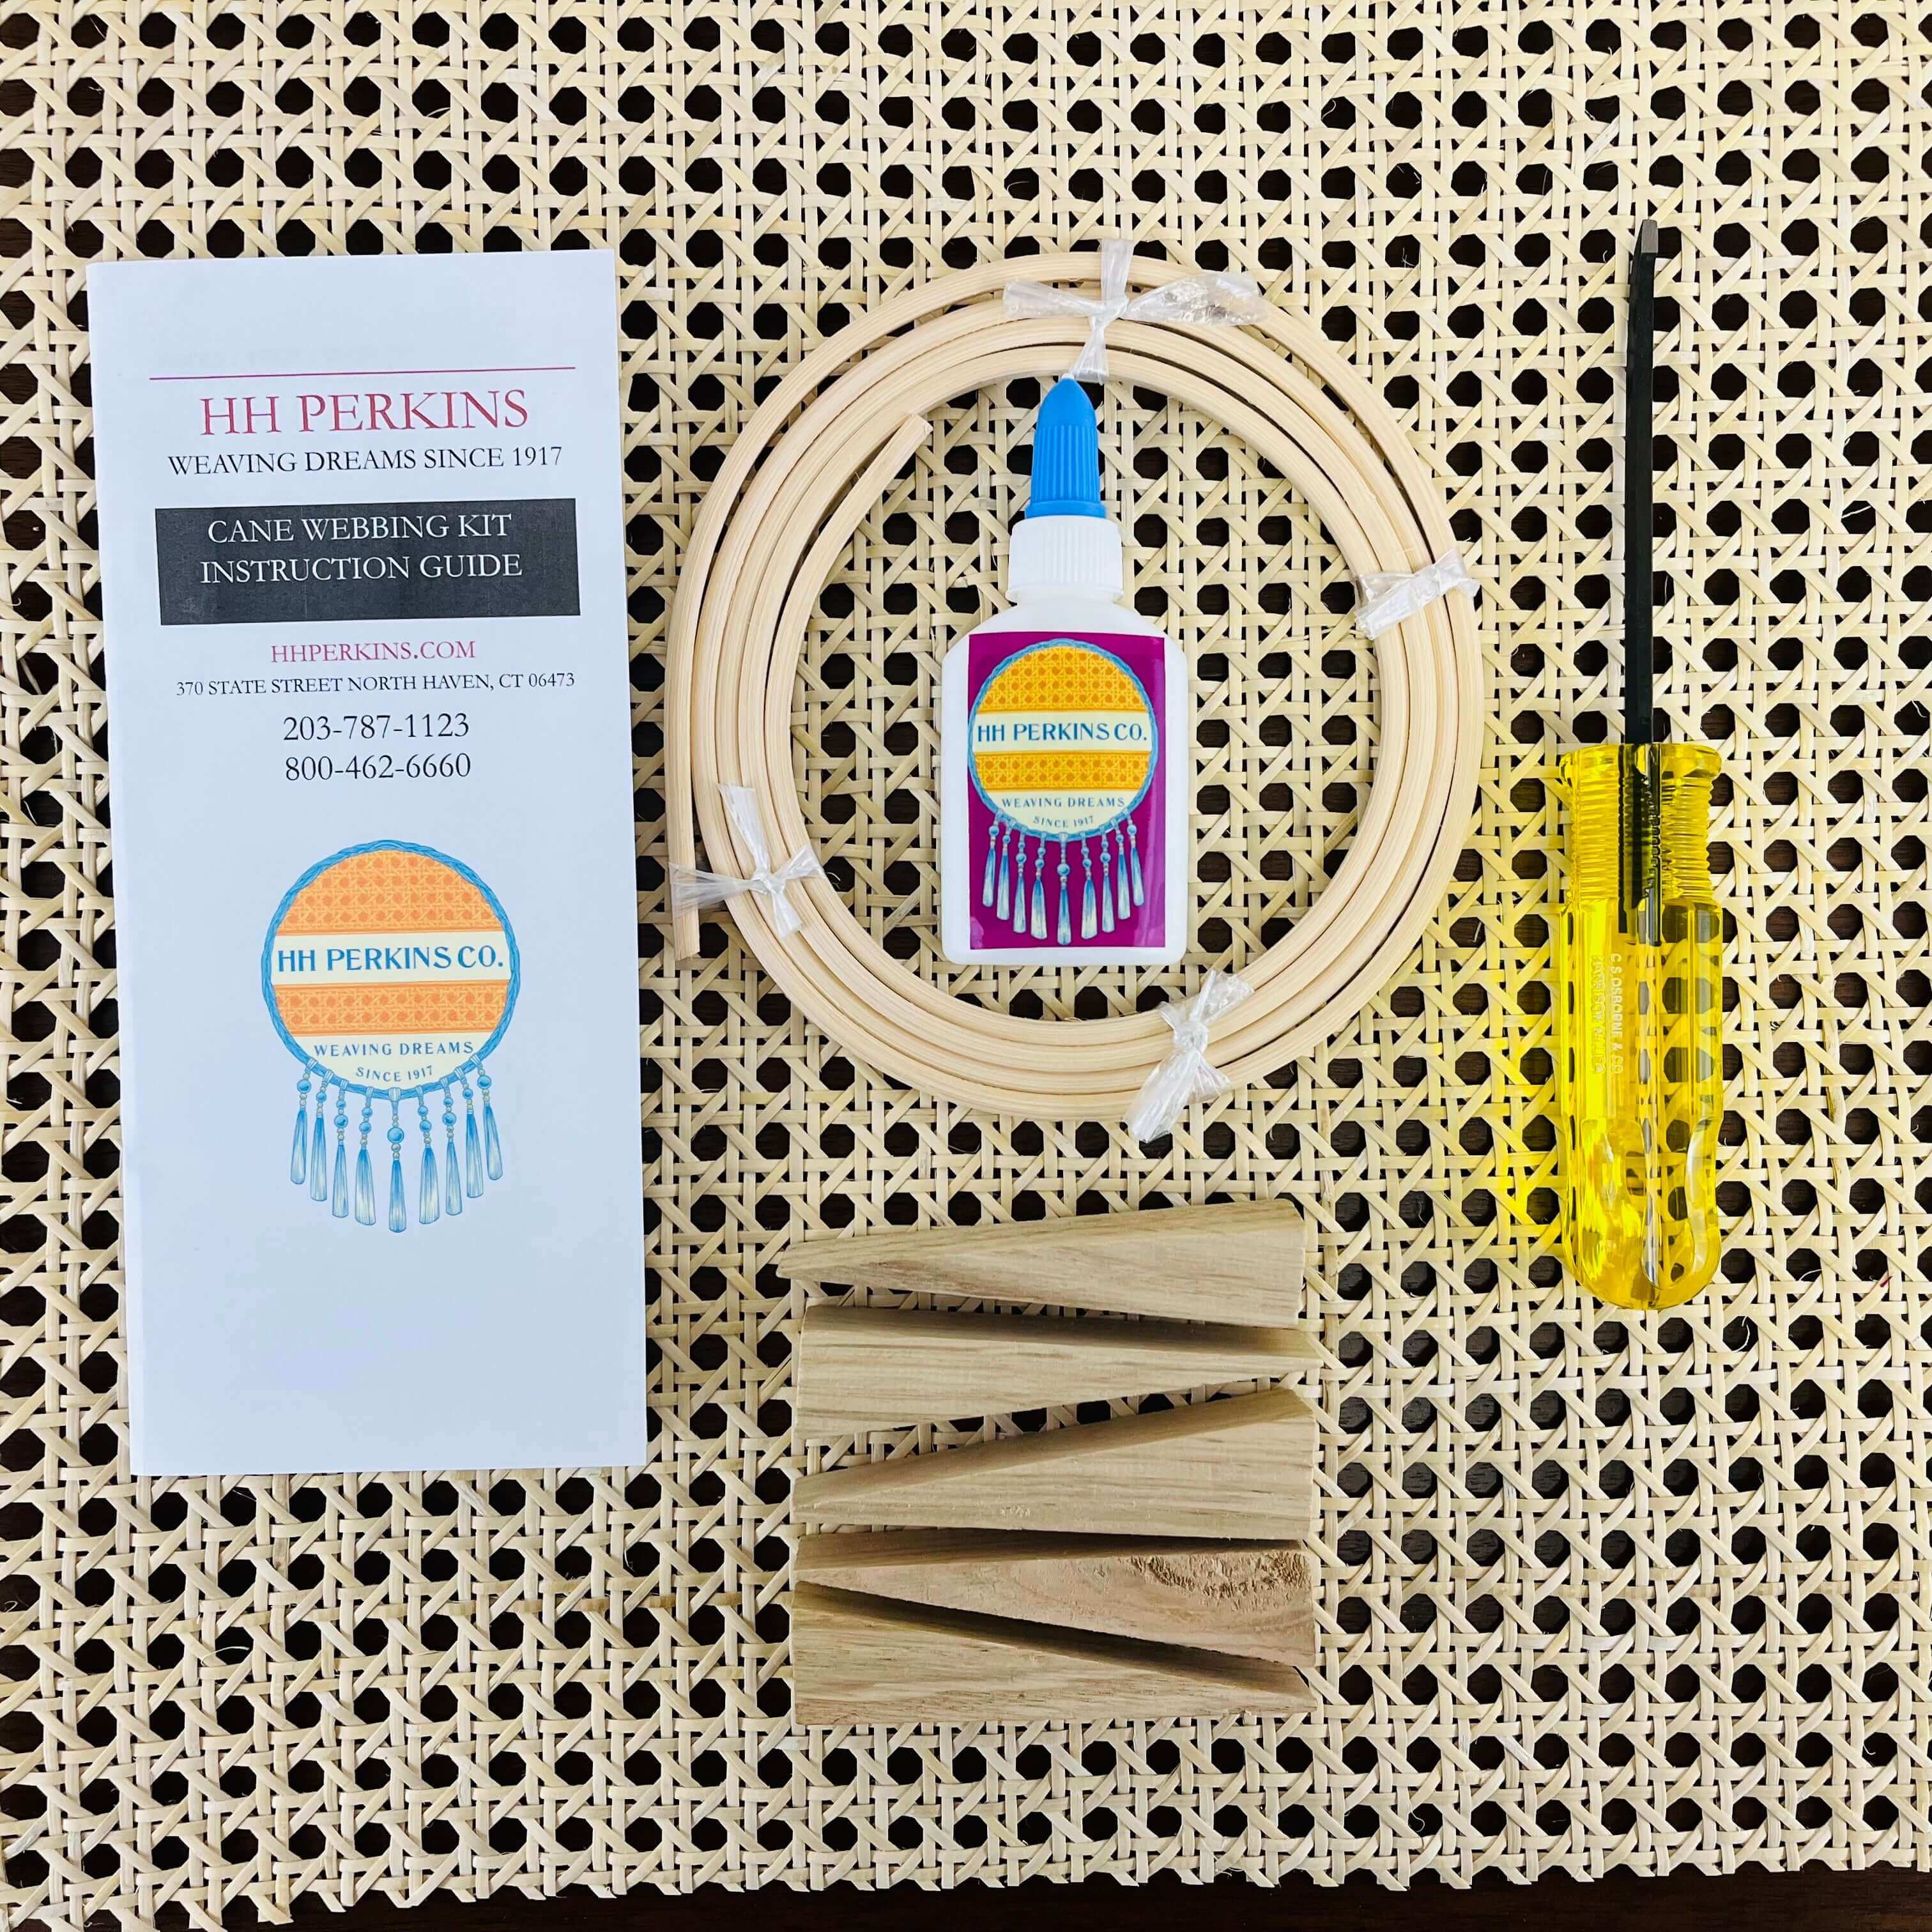
Installing cane webbing into cabinets can give your cabinets a fresh and unique look. You can choose from many styles of rattan webbing to give your cabinets the style you’re looking for. This technique is commonly used in kitchen cabinets but can be applied to cabinetry. Rattan webbing is a lightweight material made from weaving Natural Strand Cane into a pre-woven cane sheet. This durable and flexible material makes it an excellent choice for cabinets and a sleek design that’ll never go out of style. See the HH Perkins Cane Webbing section to choose the cane webbing you want for your project. We’re also selling Cane Webbing Kits now too! They’re complete with everything you need to complete your project. The cane webbing kit includes the following:
- 18" x 18" Fine 1/2" Cane Webbing
- A 6ft Coil of #8.5 Reed Spline
- 1" Chisel
- 2oz Clear Drying Glue
- 5 pack of wooden wedges
- Directions

https://hhperkins.com/collections/cane-webbing-reed-spline
Here are the general steps to follow when installing cane webbing in cabinets:
Step 1: Measure the cabinet opening
Measure the length and width of the cabinet opening where you plan to attach the rattan webbing. Add an inch to the length and width measurement to ensure that you have enough material to weave through the frame. Installing rattan webbing is much easier if you take the door of the cabinet to start the installation process.
Step 2: Cut the cane webbing
Cut the rattan webbing to the appropriate size using scissors, a utility knife, or a 1" Chisel. Make sure the edges are clean and straight to ensure a clean and professional look. You can clean out the grooves with a spline chisel, caning awl, or another small tool. Make sure to clean out any excess glue before installing. If you are replacing a piece of cane webbing, you want to ensure any old pieces of cane are taken out before installing the new piece of cane webbing. This includes broken pieces, glue, wood shavings, etc. You want your groove to be as clean as the driven snow before installing a new piece of cane webbing.
https://hhperkins.com/collections/tools
Step 3: Soak the cane webbing in water
Soak the rattan webbing in water for about 3 hours. Some people soak for an hour, but we recommend soaking the cane webbing for 3 hours before using it. This will make the material more flexible, making it easier to insert into the cabinet frame. Cane webbing is very durable in cabinets, dressers, and bureaus. Soaking the webbing will also prevent it from sagging during and after installation. Water will keep the rattan webbing firm, no matter which style of cane webbing you use. Radio box weave, Fine 1/2" mesh, Swedish Modern, Close wove, 1" Jumbo, Medium 5/8", etc. You should use the same install process for all of these styles.
Step 4: Attach the cane webbing to the cabinet frame.
Using a staple gun, attach one end of the rattan webbing to the interior bottom of the cabinet frame. Make sure the webbing is evenly stretched and stapled in place. Repeat this process with the opposite end of the rattan webbing, ensuring that the material is evenly stretched and stapled. You can use a high-power staple gun, a regular staple gun, or even a standard stapler for some projects.

Step 5: Fasten the cane webbing to the cabinet frame.
Starting at one end of the cabinet frame, attach the rattan webbing through the frame, You want the webbing to be flush against the sides of the cabinet and not sagging in the middle. That’s why you should definitely soak it in water before using it. Make sure the rattan webbing is evenly spaced and centered in the opening. Once you have secured the rattan webbing through the entire cabinet frame, staple the other end to the interior top of the frame.
Step 6: Trim the cane webbing
Once the cane webbing is held firmly in place with staples, it’s time to cut off those overhanging pieces. Using scissors, a utility knife, or a 1” Chisel, trim any excess rattan webbing hanging over the edges of the cabinet frame. Be careful not to cut into the frame or the woven rattan webbing. We recommend using a chisel for this part because you can shave it off in one fell swoop.
Step 7: Allow the cane webbing to dry
Allow the cane webbing to dry before using or cleaning the cabinets. This will ensure that the webbing is securely stretched and held in place. Allow the rattan webbing to dry for about 6 hours. In chairs, you want it to dry for about a day before sitting on it.
In conclusion, installing rattan webbing in cabinets can add a unique and stylish touch to your cabinetry. With these general steps, you can easily install rattan webbing in your cabinets and achieve a professional look. Remember to measure carefully, soak the webbing in water, and staple the material evenly to ensure a secure and durable installation. HH Perkins is always here to help. You can reach us anytime by phone at (203) 787-1123 or by email at info@hhperkins.com. We are happy to help you with your installation.


Please upload banner from store admin blog pages